Badges
This article was written on 25th November 2018. Things have definitely changed since then; not least of which Gitstore is no longer in operation. I still felt this content was good to keep.
One of our goals, with Gitstore, is to make it as easy as possible for folks to sell their stuff. Today that meant I had to create a page where maintainers could go; to copy the code required to display a dynamic badge. The purpose of the badge is to click through to another page, where customers can immediately buy stuff.
It looks like this:
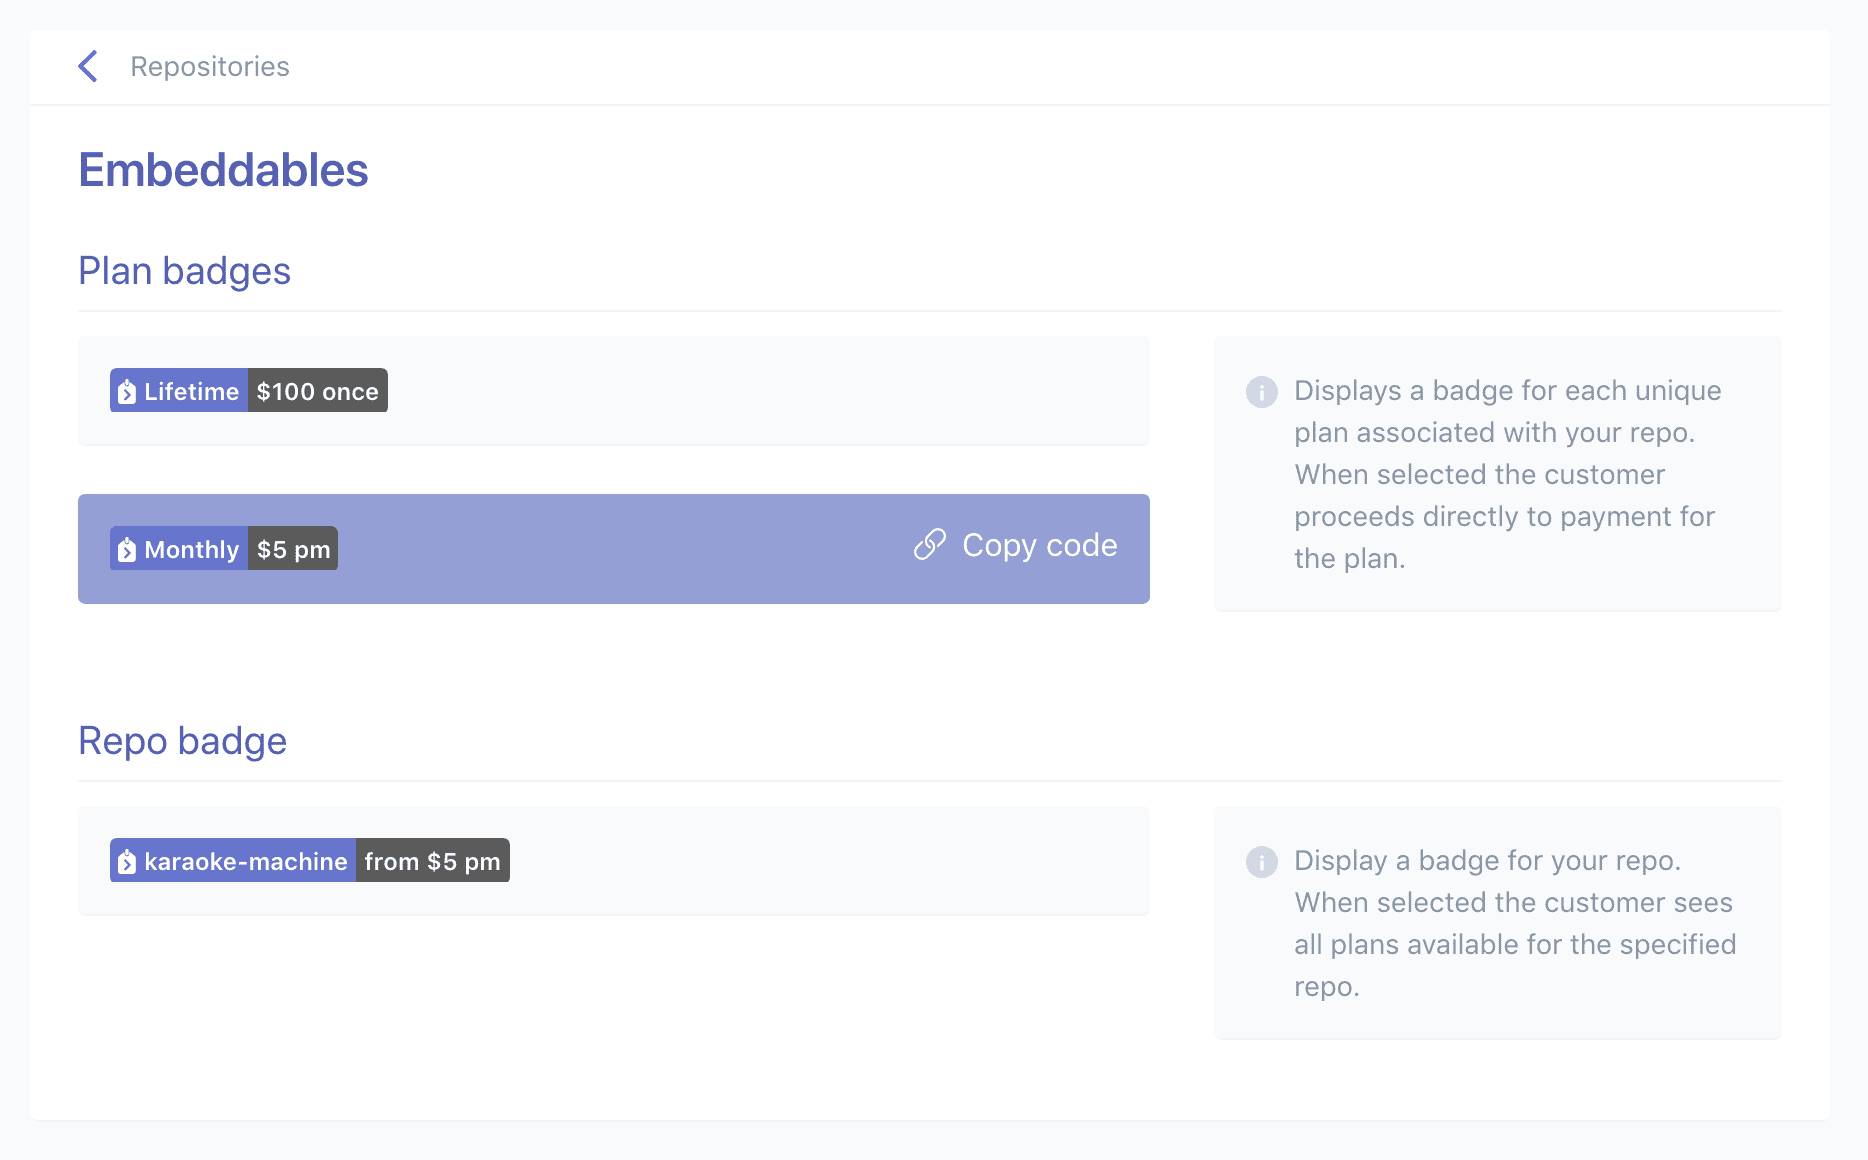
Dynamic price badges
Our hope is this kind go badge can be embedded in the readme of their open source project, as a way of “renting” services like premium support or early access to new features.
Today, I want to explain how these badges are created. I think it’s a creative process, and it might unlock some things for when you’re thinking of how to solve a similar problem…
The main technology, here, is SVG. You may not know this but you can insert ordinary HTML inside SVG; just as you can insert ordinary SVG inside HTML. The code to render these badges is this:
@php
  $width = $width ?? 1000;
  $height = $height ?? 1000;
@endphp
<svg
  viewBox="0 0 {{ $width }} {{ $height }}"
  width="{{ $width }}"
  height="{{ $height }}"
  xmlns="http://www.w3.org/2000/svg"
>
  <style xmlns="http://www.w3.org/1999/xhtml">
    .plan-badge-{{ $plan->id }} {
      display: flex;
      flex-direction: row;
      font-family: sans-serif;
      font-weight: 600;
    }

    .plan-badge-left-{{ $plan->id }} {
      display: flex;
      flex-direction: row;
      justify-content: center;
      align-items: center;
      white-space: nowrap;
      background-color: #6674cd;
      color: #fff;
      padding: 4px;
      font-size: 12px;
      border-top-left-radius: 4px;
      border-bottom-left-radius: 4px;
    }

    .plan-badge-left-icon-{{ $plan->id }} {
      display: flex;
      margin-right: 4px;
    }

    .plan-badge-left-text-{{ $plan->id }} {
      display: flex;
    }

    .plan-badge-right-{{ $plan->id }} {
      display: flex;
      white-space: nowrap;
      background-color: #5b5b5b;
      color: #fff;
      padding: 4px;
      font-size: 12px;
      border-top-right-radius: 4px;
      border-bottom-right-radius: 4px;
    }
  </style>
  <foreignObject
    width="{{ $width }}"
    height="{{ $height }}"
  >
    <div
      class="plan-badge-{{ $plan->id }}"
      xmlns="http://www.w3.org/1999/xhtml"
    >
      <div class="plan-badge-left-{{ $plan->id }}">
        <div class="plan-badge-left-icon-{{ $plan->id }}">
          <svg
            xmlns="http://www.w3.org/2000/svg"
            width="9"
            height="13"
            viewBox="0 0 9 13"
          >
            <g fill="#FFF" fill-rule="nonzero">
              <path d="M5.281 ...snip... 0z"/>
              <path d="M3.25 ...snip... 8.883z"/>
            </g>
          </svg>
        </div>
        <div class="plan-badge-left-text-{{ $plan->id }}">
          {{ $plan->name }}
        </div>
      </div>
      <div class="plan-badge-right-{{ $plan->id }}">
        {{ $plan->currency_symbol }}{{ $plan->amount }}
        @if ($plan->interval == 'month')
          pm
        @elseif ($plan->interval == 'year')
          pa
        @else
          once
        @endif
      </div>
    </div>
  </foreignObject>
</svg>
The magic is in the embedded foreignObject. This is the key to custom HTML inside SVG. You can also embed style tags, to save having to add inline styles to your elements.
You may be wondering why not just use CSS class names. The reason is that we want to be able to embed these badges inside other HTML, which probably won’t have access to the same stylesheets as our site. We have to send the CSS with the badge.
This is a Blade component. That’s not the only way you can built it, but it does give some advantages. For starters, I can embed a tiny bit of PHP logic, so that the width and height are either really large, or they’re a parameterised amount.
Turns out there are no elegant ways to shrink the size of an SVG’s viewBox, or a foreignObject, to the contained markup. You can use Javascript, but that means the badges must be embedded in a place where Javascript can execute. And that the embed code then has to contain a script tag. Yuck!
Instead, we’re starting with a huge canvas, and the badge visible in the top-left corner.
The PHP code, required to generate this file, resembles:
namespace App\Http\Controllers\Repositories\Open;

use App\Http\Controllers\Controller;
use App\Plan;
use App\Repository;
use Illuminate\Filesystem\FilesystemManager;

class ShowPlanBadge extends Controller
{
  public function __invoke(
    FilesystemManager $files,
    Repository $repository,
    Plan $plan,
    $ext
  )
  {
    // switch to a filesystem driver, called public
    // so our files are saved to the right place
    $files = $files->disk('public');

    $name = "plan-badge-{$plan->id}.svg";
    $path = "badges/{$name}";

    // we can probably get this from the filesystem object
    // but this is essentially the same place it saves to
    $storage = storage_path("app/public/{$path}");

    // we want to cache these badges for 5 minutes
    // maybe more once we learn how often they are
    // requested...
    $since = 60 * 5;

    if (
      !$files->exists($path) ||
      time() - $files->lastModified($path) > $since
    ) {
      $svg = view('repositories.plan-badge', [
        'repository' => $repository,
        'plan' => $plan,
      ]);

      // $svg is initially a view object, but we want to
      // write it as a string to the path we defined
      $files->put($path, (string) $svg);

      // ...snip
    }
  }
}
The component code renders as a self-contained SVG file. All this code does is provide it with the repository and plan data, so it can insert data from them, and write the resulting SVG code to a file.
Now we have a 1000px by 1000px image, which can be embedded like any other HTML-compatible image. But, we need to find out exactly how big it is so that we can change it to only show the image data we expect.
Turns out there are no good ways to do this either. We could use something like Imagemagick, and the corresponding PHP Pecl extension, to try and convert the SVG to a PNG. Trouble is it doesn’t support foreignObject.
The easiest way I found was to render the SVG in a browser, and take a screenshot. We could use something like Facebook’s web driver library for this, but it’s actually a lot simpler just using a Node library:
yarn add convert-svg-to-png
This installs a binary we can use like this:
// ...snip

$binary = base_path('node_modules/.bin/convert-svg-to-png');
$command = "{$binary} {$storage}";

exec($command);
This binary allows a list of files to convert, and creates them as input.svg → output.png. It retains the alpha channel, so we have something which looks roughly the same as the input SVG. I say roughly because it uses headless Chromium to take the screenshot, but it doesn’t scale the pixel ratio up by default.
The resulting image looks blurry if you are using a retina screen. This is ok, since we don’t really care about the image quality. We care about the size of the resulting pixels. To get that, we also need to strip away the surrounding transparent pixels, using another Node library:
yarn add trim-image
We can also use this with exec, but because it doesn’t install a binary; we have to hack it a bit:
// ...snip

$created = str_replace('.svg', '.png', $storage);

$command = "node -e '
  const trim = require(\"trim-image\");
  trim(\"{$created}\", \"{$created}\");
'";

exec($command);
Turns out you can pass code to execute, by giving the node binary a -e parameter. The trim function takes input and output parameters, trimming the whitespace around our badge.
Now, we should have a PNG that is the intended size of the SVG. We can read that size, and re-render the SVG to match:
// ...snip

$dimensions = getimagesize($created);

$svg = view('repositories.plan-badge', [
  'repository' => $repository,
  'plan' => $plan,
  'width' => $dimensions[0],
  'height' => $dimensions[1],
]);

$files->put($path, (string) $svg);
The generated SVG file will have an appropriate width and height.
These Node libraries assume Chromium will be able to boot, where the command is run. That won’t always be the case, as the command could be run within a Docker container or on a Digital Ocean droplet.
These are the dependencies you need to install, in both those cases, for a Debian server to be able to boot Chromium:
sudo apt-get install -yq --no-install-recommends \
  libasound2 libatk1.0-0 libc6 libcairo2 libcups2 \
  libdbus-1-3 libexpat1 libfontconfig1 libgcc1 \
  libgconf-2-4 libgdk-pixbuf2.0-0 libglib2.0-0 \
  libgtk-3-0 libnspr4 libpango-1.0-0 libpangocairo-1.0-0 \
  libstdc++6 libx11-6 libx11-xcb1 libxcb1 libxcursor1 \
  libxdamage1 libxext6 libxfixes3 libxi6 libxrandr2 \
  libxrender1 libxss1 libxtst6 libnss3
You may also be wondering that that ext controller action parameter was for. I’ve defined this route as:
$router->get(
  '/badge-{plan}.{ext}',
  'Repositories\Open\ShowPlanBadge'
)->name('repositories.plan-badge');
I want to allow someone to request the width and height values, since I went to such great lengths to get them. It’s possible to request this endpoint as badge-1.svg or badge-1.json. This is what that controls:
if ($ext === 'svg') {
  return redirect($files->url($path));
}

$dimensions = $dimensions ?? getimagesize($created);

return [
  'width' => $dimensions[0],
  'height' => $dimensions[1],
  'url' => $files->url($path),
];
The final bit of code I want to show, is the Javascript required to implement the client-to-copy behaviour we see in the screenshot:
const copyToClipboard = function(string) {
  const element = document.createElement('textarea')
  document.body.appendChild(element)

  element.value = string
  element.select()

  // this copies currently selected input textdocument.execCommand('copy')

  document.body.removeChild(element)
}

$('[data-copy-code]').on('click', function(e) {
  copyToClipboard(this.dataset.copyCode)
})
We’re using dataset, which means the code to trigger this behaviour looks like this:
@php
  assert(is_string($code));
@endphp
<button class="...snip" data-copy-code="{{ $code }}">
  <div class="flex">
    {{ $slot }}
  </div>
  <div class="...snip">
    <div class="flex mr-2">
      @include('icons.copy-link')
    </div>
    <div class="flex">
      Copy code
    </div>
  </div>
</button>
All of this amounts to a page maintainers can go, where badges are generated for each of their plans and repositories. They can embed these badges on their site or in their readme; and customers can go straight from the badge to a payment form.