Making a development app
This article was written on 11th February 2019. Some things may have changed.
I like to code on the go, but I don’t always like to bring my laptop with me. So, I’ve tried many iPad apps centred around coding, Git repository management, and code execution.
There are some great apps out there, but none of them are as easy or useful as coding on a Unix or Linux operating system. Then, this week, I tried something new.
I set up a DigitalOcean droplet; and installed a Ubuntu (with a GUI) onto it. I now have access to a server I can SSH into, and I can even connect with VNC to use it as I would; a laptop sitting on the desk
What I discovered, apart from how natural it felt to code on an iPad, was that the common setup steps are easy but tiresome. Cloud computing is usually billed by the amount of hours you use the server, and decent operating specifications can cost anywhere between $50 and $500 for a full month of use.
If I want to make this method of work sustainable; I need a way to spin up new “work” machines, back them up, and destroy them when I no longer need them. This has to happen daily.
We’re going to build an app to do the following:
- Allows us to connect to our DigitalOcean account.
- Shows us which droplets we have running.
- Allows us to make backups of the droplets, destroy droplets, and create new droplets.
- Generates unique SSH public/private keys, for each droplet.
- Uses those keys to connect to the droplets, so we can run commands on them.
I want this one app to fulfil all my setup needs, so I can have a fresh and cheap work environment, each morning.
You can find the code for this tutorial on Github. The further we go, the more I’m going to skip over, in the interest of time. There’s a lot to cover, so take a look at the source code if there’s anything I’ve skipped that you want to know about.
Topics
- Setting up
- Handling custom URLs schemes in iOS
- Handling custom URLs schemes in Android
- Storing the OAuth token
- Saving keystrokes with Context
- Querying the API
- Adding free Font Awesome icons
- Refactoring to components
- Making changes through the API
- Deleting snapshots
- Deleting droplets
- Creating droplets from snapshots
- Connecting over SSH
- Creating the SSH connect screen
- Going further
Setting up
We’ve already gone over the steps to getting a new React Native project set up; so go ahead and create a new project. I’m calling mine Developmint, since I love those food-themed names…
One of the things we want to achieve, is to allow coders to connect their DigitalOcean account to the app. DigitalOcean’s API uses OAuth 2, so we’re going to need to redirect to their login, and come back into the app with the provided auth token.
I think we should break up each separate task, in the app, into screens. We can remember which screen we’re supposed to be showing by storing the current screen in the app component’s state. Let’s do that now:
import { AppRegistry } from "react-native"
import { name as appName } from "./app.json"
import { App } from "./source/app"

AppRegistry.registerComponent(appName, () => App)
This is from
index.js
import React, { Component } from "react"
import { View } from "react-native"

import Screens from "./screens"

const styles = {
  container: {
    backgroundColor: "#fff",
    flex: 1,
  },
}

class App extends Component {
  state = {
    screen: "Connect",
    setScreen: screen => this.setState({ screen }),
  }

  render() {
    const { screen } = this.state

    const Screen = Screens[screen]

    return (
      <View style={styles.container}><Screen /></View>
    )
  }
}

export { App }
This is from
source/app.js
Under the hood, this Javascript syntax is being converted into a form that can be executed by a Javascript engine running on an iOS or Android device. The tool that’s doing some of this is called Babel.
Babel is a fantastic tool, which allows the use of all sorts of modern Javascript syntax. Take, for instance, the way we are defining state = {...} in the body of this component class. That is being moved into the constructor, in the output code, so that it doesn’t cause syntax errors in platforms that don’t support that kind of property setting syntax.
We’ve added screen and setScreen to the state, so that we can remember which screen we’re on; and have a way to change what that should be. It’s a little strange to see methods defined in state, but there’s an excellent reason why I want us to do this…
Before we get to that, let’s look at what the Connect component looks like, and how it is loaded:
import { Connect } from "./connect"

export { Connect }

export default { Connect }
This is from
source/screens/index.js
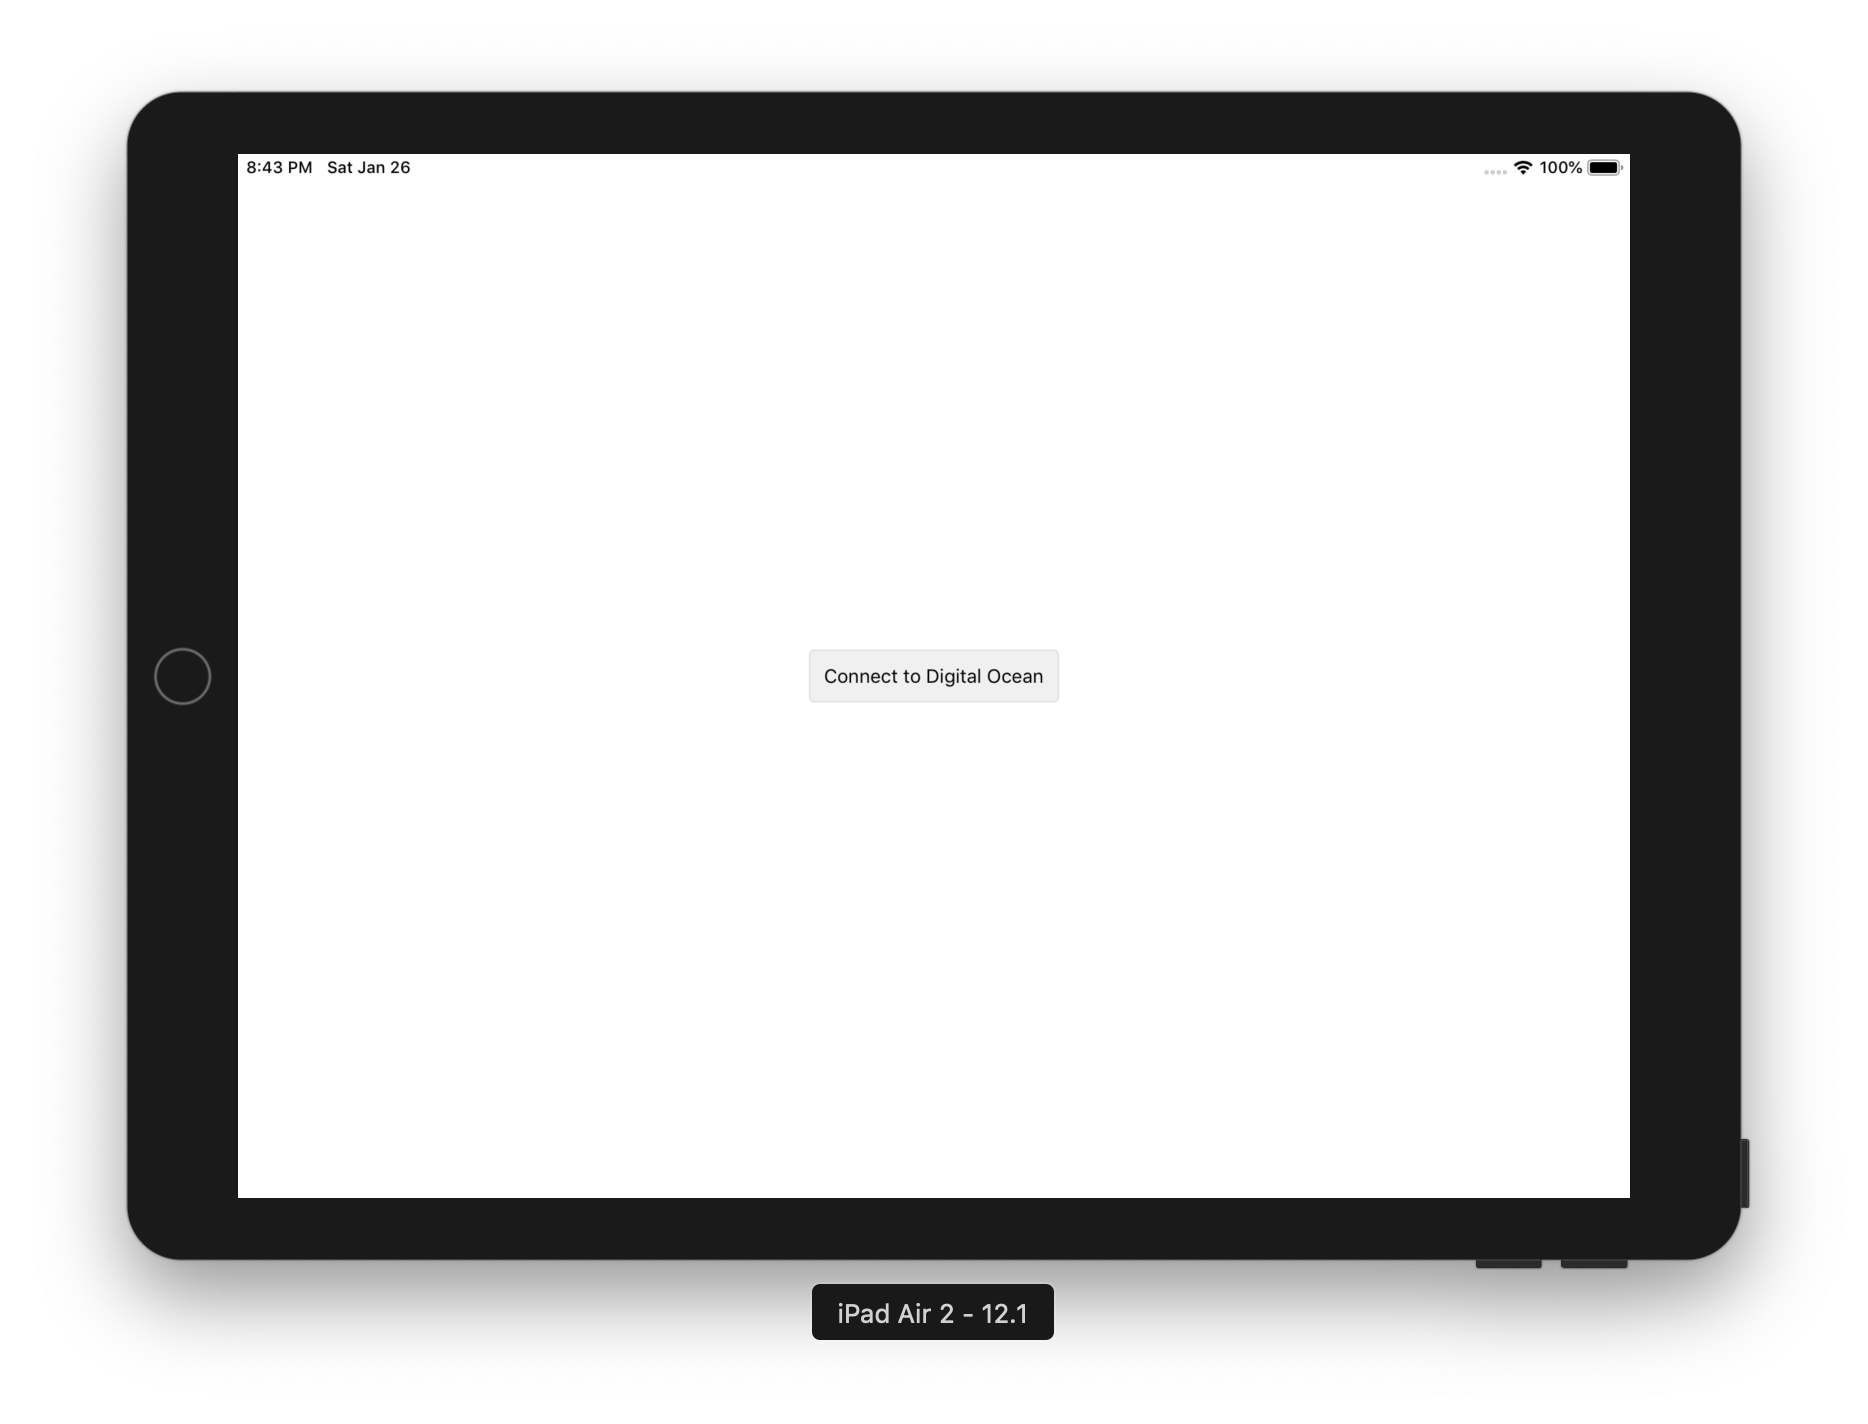
import React, { Component } from "react"
import { Text, TouchableOpacity, View } from "react-native"

const styles = {
  container: {
    backgroundColor: "#fff",
    flex: 1,
    alignItems: "center",
    justifyContent: "center",
  },
  button: {
    padding: 10,
    borderWidth: 1,
    borderColor: "#e0e0e0",
    borderRadius: 4,
    backgroundColor: "#f0f0f0",
  },
}

class Connect extends Component {
  render() {
    return (
      <View style={styles.container}>
        <TouchableOpacity>
          <View style={styles.button}>
            <Text>Connect to DigitalOcean</Text>
          </View>
        </TouchableOpacity>
      </View>
    )
  }
}

export { Connect }
This is from
source/screens/connect.js
The Connect component starts off with a single button – the one we’ll use to initiate the OAuth connection to DigitalOcean. The idea is that we will show this screen the first time a coder opens the app; so that they can give us permission to perform changes in their DigitalOcean profile.
This component is loaded in the index.js file. This file is called a façade, which means it provides a bit of abstraction over the other objects it loads. The main reason we’re using it is to provide a Screens object we can import; and then use to render the current screen.
Let’s look at the app’s main render method, again:
render() {
  const { screen } = this.state

  const Screen = Screens[screen]

  return (
    <View style={styles.container}><Screen /></View>
  )
}
This is from
source/app.js
Screens is the object source/screens/index.js returns. It should be a collection of screen component classes. We don’t want to hard-code the name of the component we want to render, so instead we resolve its component out of Screens, using the screen state value.
If we define a PascalCase constant, which contains a reference to the component we want to render; then we can use that constant as an alias.
Managing screens in our new app
Newer versions of React Native include all the native code required to interact with Safari. What we need to do, from a Javascript point of view, is tell the app when to send a link out to Safari; and when to get another back again from Safari.
We need a set of OAuth credentials, from the DigitalOcean dashboard. If you haven’t already created an account, do so now. Then, go to the API → Apps page to create a new OAuth app. You’ll find these links on the left-hand side of the page.

Creating a new OAuth application
DigitalOcean requires that redirect URLs start in either http:// or https://, which means we won’t be able to redirect directly back to our application.
Instead, I’ve set up a redirect on my blog, which will take the OAuth parameters DigitalOcean gives me, and send them on to a custom URL scheme. It’s not important what this code looks like. All that is important is that the URL changes from https://assertchris.io/oauth?... to developmint://redirect?....
Then, we need to set the “connect” button up such that it launches Safari and opens the OAuth page:
import React, { Component } from "react"

import {
  Linking,
  // ...snip
} from "react-native"

import {
  DO_AUTH_URI,
  DO_CLIENT_ID,
  DO_REDIRECT_URI,
} from "../../config"

const styles = {
  // ...snip
}

class Connect extends Component {
  componentDidMount() {
    Linking.addEventListener("url", this.onOpenUrl)
  }

  componentWillUnmount() {
    Linking.removeEventListener("url", this.onOpenUrl)
  }

  onOpenUrl = event => {
    console.log("(mint)", event.url)
  }

  onPressConnect = () => {
    const uri = `${DO_AUTH_URI}
      ?client_id=${DO_CLIENT_ID}
      &redirect_uri=${DO_REDIRECT_URI}
      &scope=read+write
      &response_type=code`

    Linking.openURL(uri).catch(error => {
      console.error(error)
    })
  }

  render() {
    const { onPressConnect } = this

    return (
      <View style={styles.container}>
        <TouchableOpacity onPress={onPressConnect}>
          {/* ...snip */}
        </TouchableOpacity>
      </View>
    )
  }
}

export { Connect }
This is from
source/screens/connect.js
Here, we’re attaching an onPressConnect method to the TouchableOpacity component we wrapped around the button. It triggers a call to open the OAuth URL in Safari.
When this Connect screen mounts, we also add a listener to trigger when the app receives a URL – when Safari opens a link back into the app.
I’m storing some sensitive DigitalOcean credentials in a configuration file, called config.js. You’ll see that I’m importing it to get hold of those details, in order to build the authorisation URL. There’s an example file, called config.example.js. Copy it to config.js, and populate it with your application’s details.
I suggest you set your own “redirect” script up, so that you’re not passing your OAuth token through https://assertchris.io. I am not currently, nor will I, store any keys that pass though; but it’s your responsibility to make sure those details don’t hit my server in the first place.
Handling custom URLs schemes in iOS
There are a few different ways to handle links back into the application. The easiest, I find, is to register this custom URL scheme in the Info.plist file:
<key>CFBundleURLTypes</key>
<array>
  <dict>
    <key>CFBundleTypeRole</key>
    <string>Editor</string>
    <key>CFBundleURLName</key>
    <string>io.assertchris.developmint</string>
    <key>CFBundleURLSchemes</key>
    <array>
      <string>developmint</string>
    </array>
  </dict>
</array>
This is from
ios/Developmint/Info.plist
If you already have a CFBundleURLTypes entry in yours; just add the <dict>...</dict> part. This tells iOS that it should listen for URLs starting with developmint://, and open them in your application. Be sure to replace io.assertchris.developmint with the Bundle Identifier of your application.
Redirecting back to an iOS application
Handling custom URLs schemes in Android
Android requires a similar sort of custom schema registration. This time, it’s in the AndroidManifest.xml file, and requires a bit more code than before:
<intent-filter>
  <action android:name="android.intent.action.VIEW" />
  <category android:name="android.intent.category.DEFAULT" />
  <category android:name="android.intent.category.BROWSABLE" />
  <data android:scheme="developmint"android:host="redirect" />
</intent-filter>
This is from
android/app/src/main/AndroidManifest.xml
There should already be another <intent-filter> element there, so put this new one underneath. The main things are in the <data> tag. You need to include both developmint (or whatever schema you’ve chosen), and redirect. This will only match URLs like developmint://redirect, so it’s important that however you get redirected back to the app matches your schema and has a “host”.
Redirecting back to an iOS application
Storing the OAuth token
Now that we’re getting back into the app, we should also have the OAuth token. We need to store it, and show a new screen to the user. In fact, we should only show the Connect screen if there is no valid token in the app’s storage.
Let’s look at how to store the OAuth token, and then how to show a new screen if there is a valid OAuth token stored:
import React, { Component } from "react"

import {
  AsyncStorage,
  // ...snip
} from "react-native"

// ...snip

const styles = {
  // ...sniperrorText: {
    color: "red",
  },
}

class Connect extends Component {
  state = {
    error: undefined,
  }

  componentDidMount() {
    Linking.addEventListener("url", this.onOpenUrl)
  }

  componentWillUnmount() {
    Linking.removeEventListener("url", this.onOpenUrl)
  }

  onOpenUrl = async ({ url }) => {
    const { setToken, setScreen } = this.context
    const { setState } = this

    const matchedCode = url.match(/code=(.*)$/)

    if (matchedCode) {
      const code = matchedCode[1]

      const formattedUrl = `https://cloud.digitalocean.com/v1/oauth/token
        ?grant_type=authorization_code
        &code=${code}
        &client_id=${DO_CLIENT_ID}
        &client_secret=${DO_CLIENT_SECRET}
        &redirect_uri=${DO_REDIRECT_URI}`

      const response = await fetch(formattedUrl, {
        method: "POST",
      })

      const result = await response.json()

      if (result.access_token) {
        const token = result.access_token

        await AsyncStorage.setItem("token", token)

        setToken(token)
        setScreen("Overview")

        return
      }
    }

    setState.call(this, {
      error: "Could not connect, please try again",
    })
  }

  onPressConnect = () => {
    // ...snip
  }

  render() {
    const { error } = this.state
    const { onPressConnect } = this

    return (
      <View style={styles.container}>
        {error ? (
          <Text style={styles.errorText}>{error}</Text>
        ) : null}
        {/* ...snip */}
      </View>
    )
  }
}

export { Connect }
This is from
source/screens/connect.js
I want us to show an error message if we can’t connect, for any reason. So, we’ve added an error state value, which is initially undefined. We’ve also used that value to render an error message (if there is one to be rendered) above the connect button.
For some reason, when I open the app from a Safari redirect; this.setState doesn’t have access to the connect this context. That’s why I’m calling it with
setState.call(this, ...).
Next, we try to match a code=... URL value. If the OAuth attempt is successful, this will contain a code we can use to request a token. We then have to request a token we can use for subsequent API requests.
If we don’t get a requester code, or an access token, we populate the error message state.
Once we can match the token, we store it in AsyncStorage. This ensures we can load it again, even after the app is closed and re-opened. We also call the setScreen and setToken methods, which we receive through the props.
Let’s send those props now:
import React, { Component } from "react"
import { View } from "react-native"

import Screens from "./screens"

const styles = {
  // ...snip
}

class App extends Component {
  state = {
    screen: "Connect",
    setScreen: screen => this.setState({ screen }),
    token: undefined,
    setToken: token => this.setState({ token }),
  }

  render() {
    const { screen } = this.state

    const Screen = Screens[screen]

    return (
      <View style={styles.container}><Screen {...this.state} /></View>
    )
  }
}

export { App }
This is from
source/app.js
We’ve added a couple new state values: token and setToken. We’re also passing all the state values to whichever screen is rendered. Speaking of which, we need to create that new Overview screen:
import { Connect } from "./connect"
import { Overview } from "./overview"

export { Connect, Overview }

export default { Connect, Overview }
This is from
source/screens/index.js
import React, { Component } from "react"
import { Text, View } from "react-native"

const styles = {
  container: {
    backgroundColor: "#fff",
    flex: 1,
    alignItems: "center",
    justifyContent: "center",
  },
}

class Overview extends Component {
  render() {
    return (
      <View style={styles.container}>
        <Text>Overview</Text>
      </View>
    )
  }
}

export { Overview }
This is from
source/screens/overview.js
There’s nothing to this Overview screen, yet… However, we’re not done with that token value. We need to make sure to read it, when the app opens, in case the coder has already authenticated:
import React, { Component } from "react"
import { AsyncStorage, View } from "react-native"

import Screens from "./screens"

const styles = {
  // ...snip
}

class App extends Component {
  state = {
    // ...snip
  }

  async componentDidMount() {
    const { setToken, setScreen } = this.state
    const token = await AsyncStorage.getItem("token")

    if (token) {
      setToken(token)
      setScreen("Overview")
    }
  }

  render() {
    // ...snip
  }
}

export { App }
This is from
source/app.js
If the token is present, we “redirect” to the overview page, after storing the token in state.
Saving keystrokes with Context
I don’t really like how we’ve passed the whole state object as props to Connect. I’d far rather we use the new Context API to selectively pull values and methods our of it.
The new context API looks like this:
import { createContext } from "react"

const { Consumer, Provider } = createContext({})

export { Consumer, Provider }
This is from
source/context.js
There are two parts to each context. There’s one that provides a way to set the value of the context, and then there’s another that provides a way to get values out of the context.
We can set the value, here:
// ...snip

import Screens from "./screens"
import { Context } from "./context"

// ...snip

class App extends Component {
  // ...snip

  render() {
    const { state } = thisconst { screen } = state

    const Screen = Screens[screen]

    return (
      <View style={styles.container}><Context.Provider value={state}><Screen /></Context.Provider></View>
    )
  }
}

export { App }
This is from
source/app.js
To set the value of the context, we give it in the value prop of the Provider component. We can get the value, here:
// ...snip

import { Context } from "../context"

// ...snip

class Overview extends Component {
  render() {
    return (
      <View style={styles.container}>
        <Text>Overview</Text>
        <Context.Consumer>
          {({ token }) => <Text>{token}</Text>}
        </Context.Consumer>
      </View>
    )
  }
}

export { Overview }
This is from
source/screens/overview.js
Context consumers use render props as a way of pulling values out of the context, which allows the composition of multiple context instances. Sometimes, we want a context value before the rendermethod. In these times, we can specific which context a component should listen to:
// ...snip

import { Context } from "../context"

// ...snip

class Connect extends Component {
  static contextType = Context

  // ...snip

  onOpenUrl = async ({ url }) => {
    const { setToken, setScreen } = this.context
    const { setState } = this

    // ...snip
  }

  // ...snip
}

export { Connect }
This is from
source/screens/connect.js
If we specify our context as the one to which Connect should listen; we can access setToken and setScreen out of context, instead of props. Connect could be nested many levels deeper, and we could still get those methods as needed.
This is a power paradigm to be aware of because it mitigates the hassle of passing values and methods down the entire hierarchy of components. It’s also the reason why we started storing methods in the state of App.
Querying the API
Now that we have an access token, we can begin to make requests to the DigitalOcean API. First us, we need to fetch our droplets, to see what’s running:
// ...snip

const request = async (token, method, url, data = {}) => {
  const headers = {
    "Content-Type": "application/json",
    Authorization: `Bearer ${token}`,
  }

  const formattedUrl = url
  const formattedBody = new FormData()

  const parameters = {
    method,
    headers,
  }

  if (method === "GET") {
    Object.keys(data).forEach(key => {
      const encoded = encodeURIComponent(data[key])
      formattedUrl += `${key}=${encoded}`
    })
  }

  if (method === "POST") {
    Object.keys(data).forEach(key => {
      formattedBody.append(key, data[key])
    })

    parameters.body = formattedBody
  }

  return fetch(formattedUrl, parameters)
}

class App extends Component {
  state = {
    screen: "Connect",
    setScreen: screen => this.setState({ screen }),
    token: undefined,
    setToken: token => this.setState({ token }),
    droplets: [],
    isLoadingDroplets: false,
    getDroplets: async () => {
      const { token } = this.state

      this.setState({ isLoadingDroplets: true })

      const response = await request(
        token,
        "GET",
        "https://api.digitalocean.com/v2/droplets",
      )

      const result = await response.json()

      this.setState({
        droplets: result.droplets,
        isLoadingDroplets: false,
      })
    },
  }

  // ...snip
}

export { App }
This is from
source/app.js
We’ve added a few things to state:
- There’s an empty array of droplets, which will get populated after we request a list of droplets from the API.
- There’s a boolean value to track when the droplets are busy loading.
- There’s a method to call, which will fetch all droplets for our account.
The API limits requests to 20 items per page. If more than 20 items are available, it will return a link to the next page of results. I don’t want to implement that functionality yet, but it is outlined in the documentation.
Then, lets call the getDroplets method from the Overview screen:
// ...snip

class Overview extends Component {
  static contextType = Context

  async componentDidMount() {
    const { getDroplets } = this.context

    await getDroplets()
  }

  render() {
    const { droplets, isLoadingDroplets } = this.context

    return (
      <View style={styles.container}><Text>Overview</Text>
        {isLoadingDroplets ? (
          <Text>Loading droplets...</Text>
        ) : (
          droplets.map(this.renderDroplet)
        )}
      </View>
    )
  }

  renderDroplet = droplet => {
    return (
      <View key={droplet.id}><Text>{droplet.name}</Text></View>
    )
  }
}

export { Overview }
This is from
source/screens/overview.js
We don’t need to wait for the results of the getDroplets method, since it will update the state; and thereby cause a re-render of the overview screen.
Loading droplets
In addition to droplets, we also need to show what snapshots a coder has in their account. The idea is that they should be able to create new droplets from snapshots, delete snapshots, and create new snapshots from existing droplets. Here’s the first bit:
state = {
  // ...snipsnapshots: [],
  isLoadingSnapshots: false,
  getSnapshots: async () => {
    const { token } = this.state

    this.setState({ isLoadingSnapshots: true })

    const response = await request(
      token,
      "GET",
      "https://api.digitalocean.com/v2/snapshots",
    )

    const result = await response.json()

    this.setState({
      snapshots: result.snapshots,
      isLoadingSnapshots: false,
    })
  },
}
This is from
source/app.js
This is very similar to the code we have for loading droplets. We could probably abstract it a bit, but I think duplication is fine for now.
import React, { Component } from "react"
import { ScrollView, Text, View } from "react-native"

import { Context } from "../context"

const styles = {
  containerOuter: {
    backgroundColor: "#fff",
    flex: 1,
  },
  containerInner: {
    padding: 125,
    alignItems: "flex-start",
    justifyContent: "center",
  },
  loading: {
    margin: 5,
  },
  header: {
    width: "100%",
    marginHorizontal: 5,
    marginVertical: 15,
    flexShrink: 1,
    alignItems: "flex-start",
    justifyContent: "center",
  },
  headerText: {
    lineHeight: 30,
    fontSize: 20,
  },
  blocks: {
    flexShrink: 1,
    flexDirection: "row",
    flexWrap: 1,
  },
  block: {
    width: 200,
    height: 200,
    flexShrink: 1,
    padding: 10,
    margin: 5,
    borderWidth: 1,
    borderColor: "#e0e0e0",
    borderRadius: 4,
    backgroundColor: "#f0f0f0",
  },
  blockName: {
    width: "100%",
    flexShrink: 1,
    alignItems: "center",
    justifyContent: "center",
  },
  blockNameText: {
    textAlign: "center",
    lineHeight: 27,
    fontSize: 18,
  },
}

class Overview extends Component {
  static contextType = Context

  async componentDidMount() {
    const { getDroplets, getSnapshots } = this.context

    await Promise.all([getDroplets(), getSnapshots()])
  }

  render() {
    const {
      droplets,
      isLoadingDroplets,
      snapshots,
      isLoadingSnapshots,
    } = this.context

    return (
      <ScrollView
        style={styles.containerOuter}
        contentContainerStyle={styles.containerInner}
      >
        <View style={styles.header}>
          <Text style={styles.headerText}>Droplets</Text>
        </View>
        <View style={styles.blocks}>
          {isLoadingDroplets ? (
            <View style={styles.loading}><Text>Loading droplets...</Text></View>
          ) : (
            droplets.map(this.renderDroplet)
          )}
        </View>
        <View style={styles.header}>
          <Text style={styles.headerText}>Snapshots</Text>
        </View>
        <View style={styles.blocks}>
          {isLoadingSnapshots ? (
            <View style={styles.loading}><Text>Loading snapshots...</Text></View>
          ) : (
            snapshots.map(this.renderSnapshot)
          )}
        </View>
      </ScrollView>
    )
  }

  renderDroplet = droplet => {
    return (
      <View key={droplet.id} style={styles.block}>
        <View style={styles.blockNameText}>
          <Text style={styles.blockNameText}>
            {droplet.name}
          </Text>
        </View>
      </View>
    )
  }

  renderSnapshot = snapshot => {
    return (
      <View key={snapshot.id} style={styles.block}>
        <View style={styles.blockNameText}>
          <Text style={styles.blockNameText}>
            {snapshot.name}
          </Text>
        </View>
      </View>
    )
  }
}

export { Overview }
This is from
source/screens/overview.js
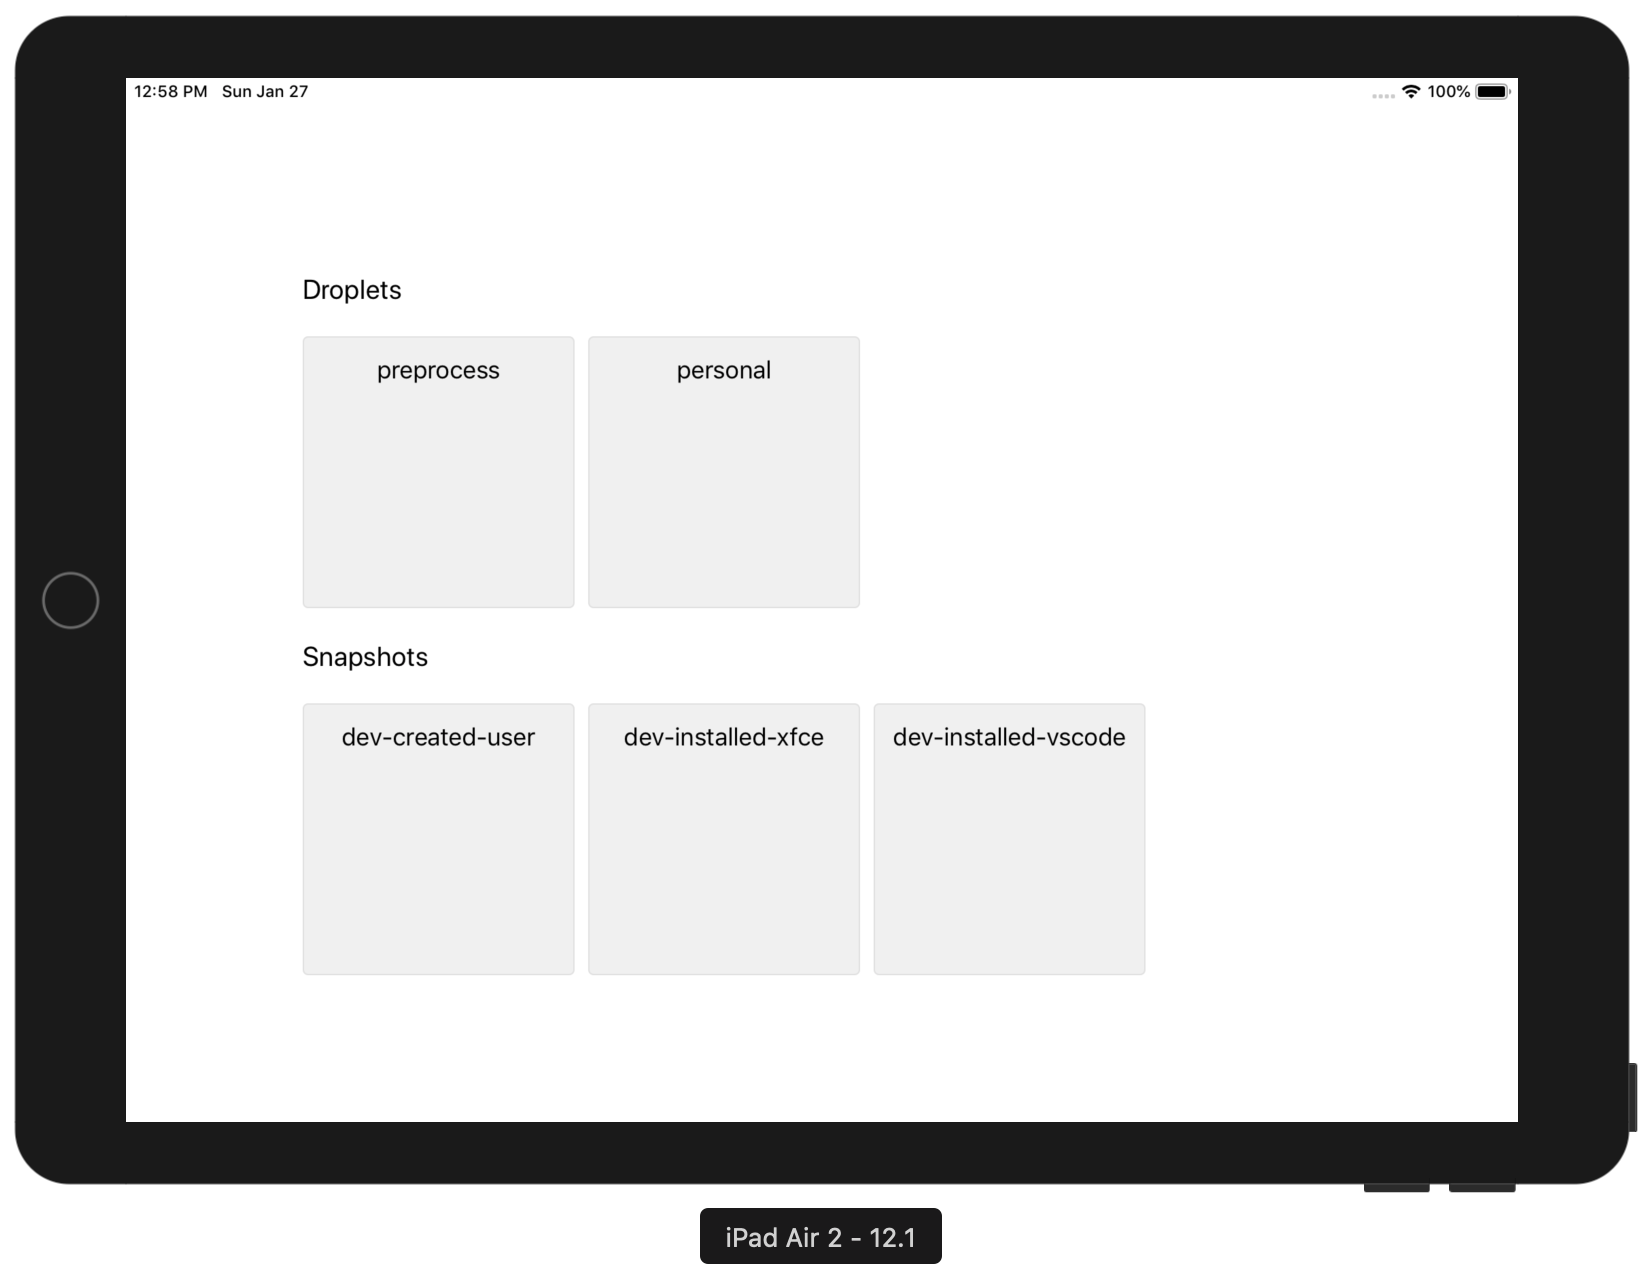
Loading droplets and snapshots
Adding free Font Awesome icons
I want to add some actions to each of these cards. These would look great if they were in the form of icons, instead of plain text. Luckily, Font Awesome provide many free icons; and there are libraries to use them in a React Native project. Let’s start by adding the library, and telling React Native link which fonts we need to load:
yarn add react-native-fontawesome
"rnpm": {
  "assets": [
    "./assets/fonts/"
  ]
}
This is from
package.json
This bit of configuration tells the react-native link command which fonts to copy into the iOS and Android source code folders. Next, we need to download the Font Awesome font files, and place them in that assets/fonts folder.
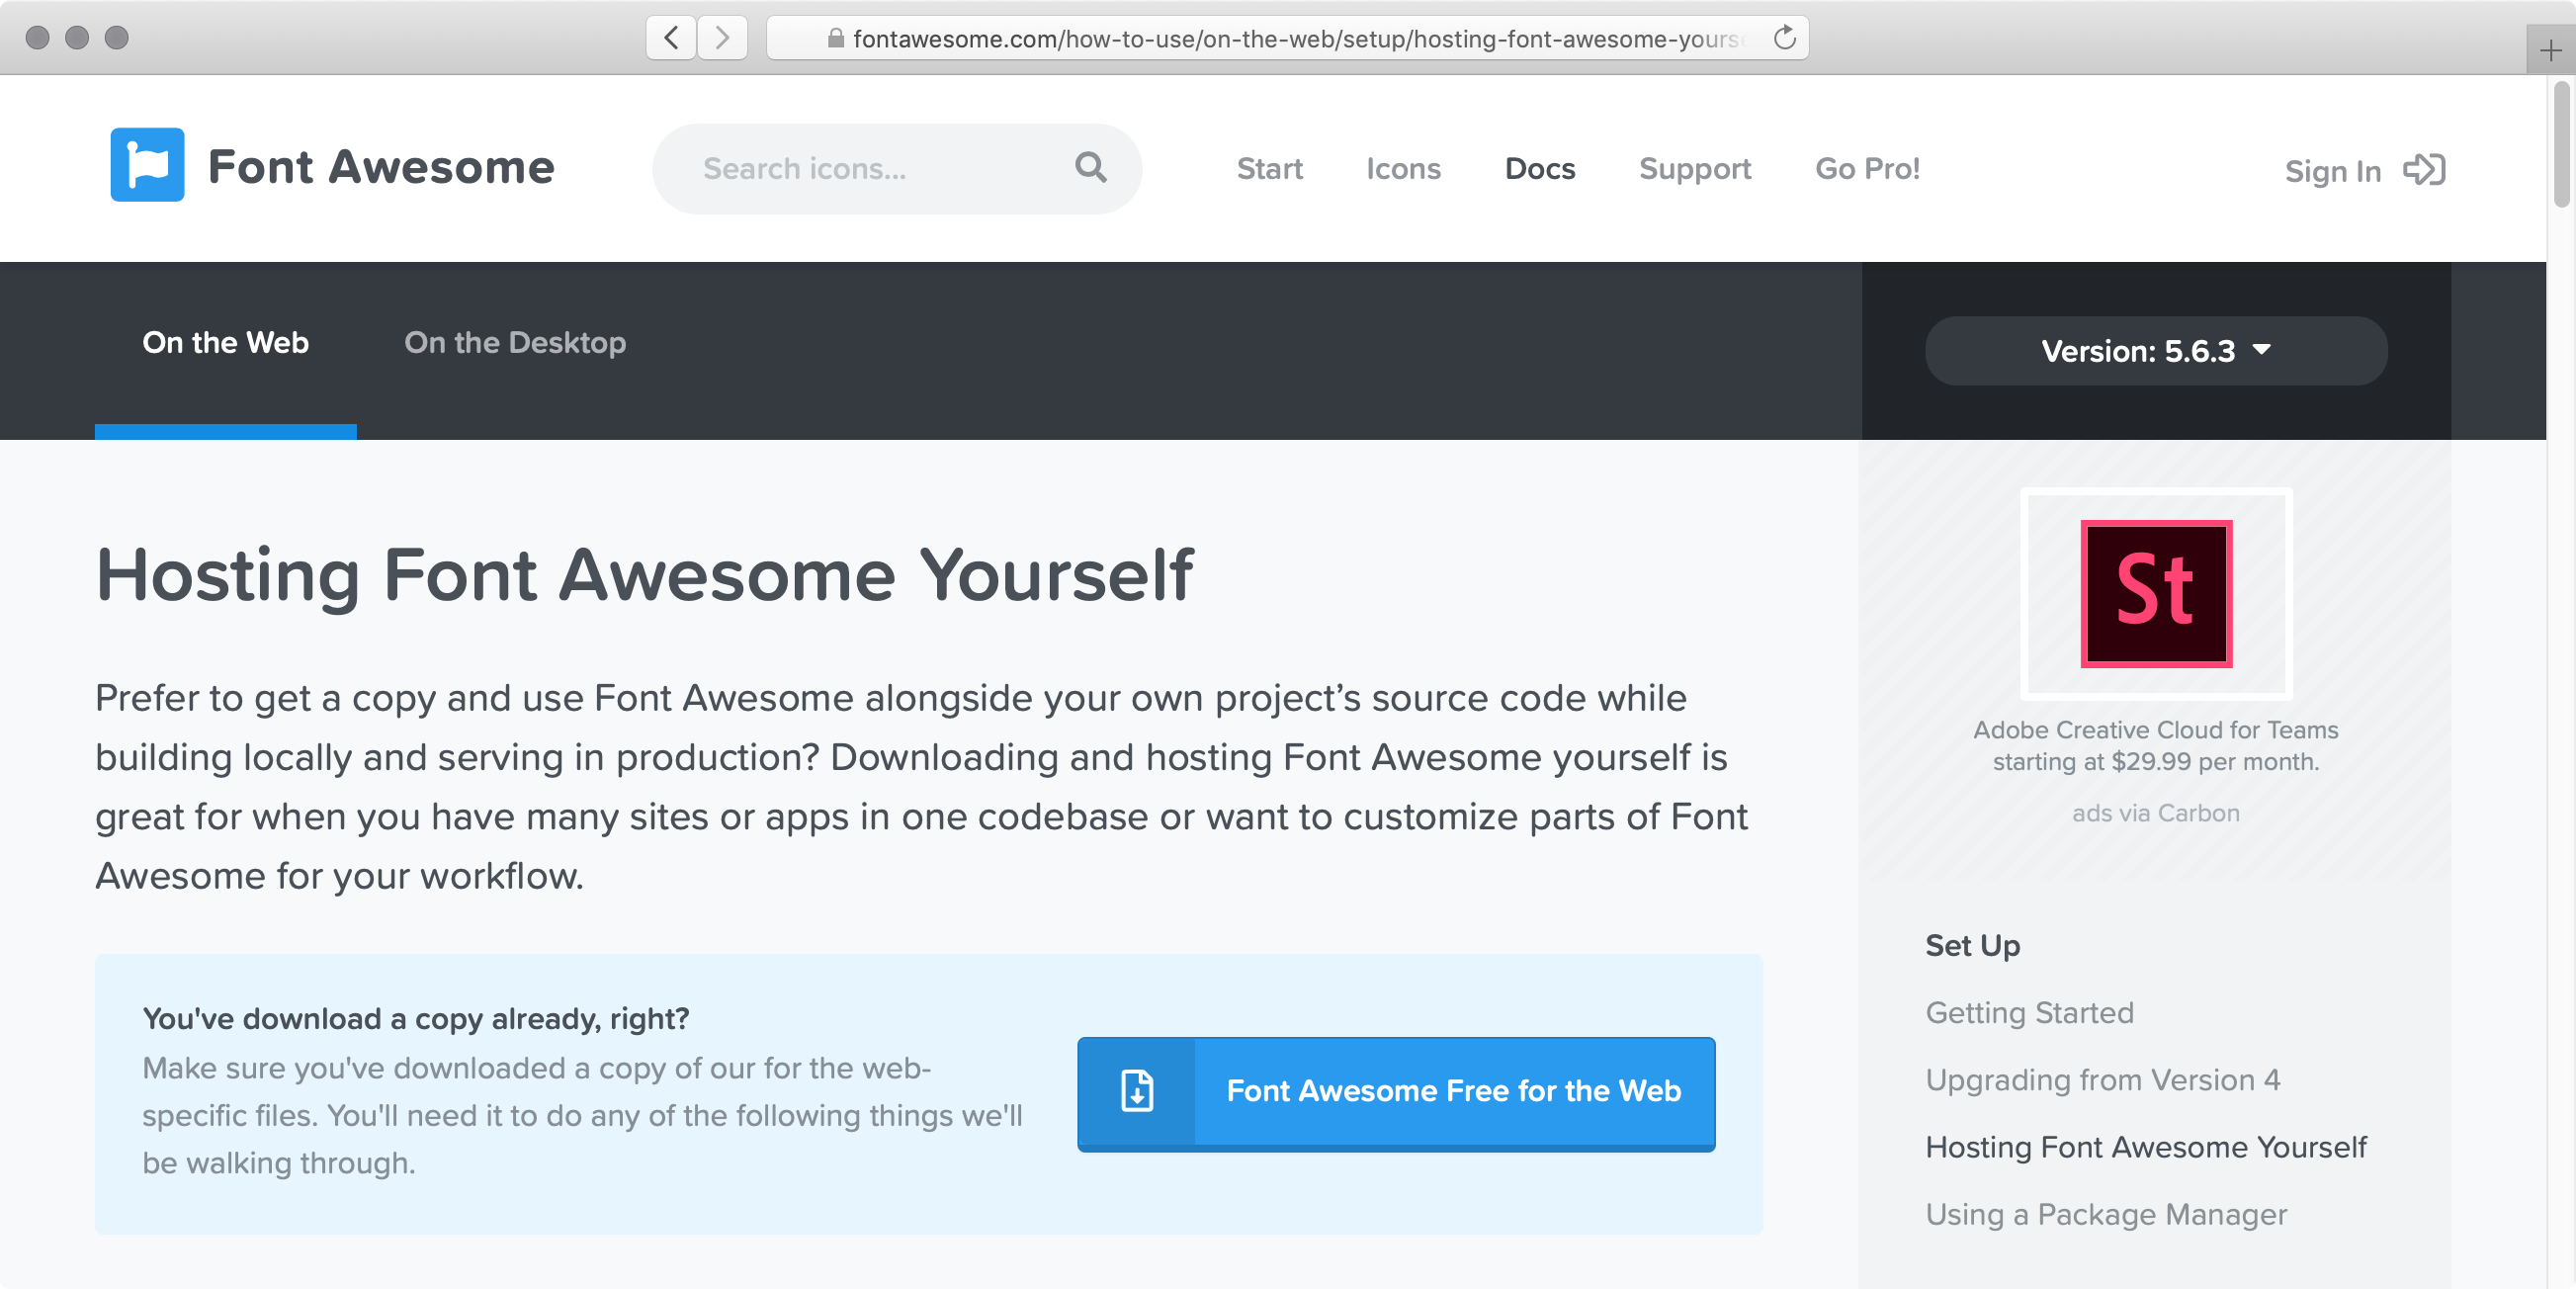
Downloading the Font Awesome fonts
Now, we can run the link command, and the fonts should be copied into the iOS and Android folders:
react-native link
Then, we can add these icons into the UI:
import React, { Component } from "react"

import {
  Alert,
  ScrollView,
  Text,
  TouchableWithoutFeedback,
  View,
} from "react-native"

import FontAwesome, {
  Icons,
} from "react-native-fontawesome"

import { Context } from "../context"

const styles = {
  containerOuter: {
    backgroundColor: "#fff",
    flex: 1,
  },
  containerInner: {
    padding: 125,
    alignItems: "flex-start",
    justifyContent: "center",
  },
  loading: {
    margin: 5,
  },
  header: {
    width: "100%",
    marginHorizontal: 5,
    marginVertical: 15,
    flexShrink: 1,
    alignItems: "flex-start",
    justifyContent: "center",
  },
  headerText: {
    lineHeight: 30,
    fontSize: 20,
  },
  blocks: {
    flexShrink: 1,
    flexDirection: "row",
    flexWrap: 1,
  },
  block: {
    width: 200,
    height: 200,
    flexShrink: 1,
    alignItems: "center",
    justifyContent: "space-between",
    padding: 20,
    margin: 5,
    borderWidth: 1,
    borderColor: "#e0e0e0",
    borderRadius: 4,
    backgroundColor: "#f0f0f0",
  },
  blockName: {
    width: "100%",
    flexShrink: 1,
    alignItems: "center",
    justifyContent: "center",
  },
  blockNameText: {
    textAlign: "center",
    lineHeight: 30,
    fontSize: 20,
  },
  actions: {
    flexShrink: 1,
    flexDirection: "row",
  },
  icon: {
    fontSize: 40,
    paddingHorizontal: 16,
    paddingVertical: 12,
  },
}

class Overview extends Component {
  static contextType = Context

  async componentDidMount() {
    const { getDroplets, getSnapshots } = this.context

    await Promise.all([getDroplets(), getSnapshots()])
  }

  onPressDeleteDroplet = droplet => {
    const name =
      droplet.name[0].toUpperCase() + droplet.name.slice(1)

    Alert.alert(
      `Delete ${name}`,
      `Are you sure you want to delete ${name}?`,
      [
        {
          text: "Cancel",
          style: "cancel",
        },
        {
          text: "Ok",
          onPress: () => alert("<delete>"),
        },
      ],
      { cancelable: false },
    )
  }

  onPressSnapshotDroplet = droplet => {
    const name =
      droplet.name[0].toUpperCase() + droplet.name.slice(1)

    Alert.alert(
      `Delete ${name}`,
      `Are you sure you want to create a snapshot of ${name}?`,
      [
        {
          text: "Cancel",
          style: "cancel",
        },
        {
          text: "Ok",
          onPress: () => alert("<snapshot>"),
        },
      ],
      { cancelable: false },
    )
  }

  onPressDeleteSnapshot = snapshot => {
    const name =
      snapshot.name[0].toUpperCase() +
      snapshot.name.slice(1)

    Alert.alert(
      `Delete ${name}`,
      `Are you sure you want to delete ${name}?`,
      [
        {
          text: "Cancel",
          style: "cancel",
        },
        {
          text: "Ok",
          onPress: () => alert("<delete>"),
        },
      ],
      { cancelable: false },
    )
  }

  render() {
    const {
      droplets,
      isLoadingDroplets,
      snapshots,
      isLoadingSnapshots,
    } = this.context

    return (
      <ScrollView
        style={styles.containerOuter}
        contentContainerStyle={styles.containerInner}
      >
        <View style={styles.header}>
          <Text style={styles.headerText}>Droplets</Text>
        </View>
        <View style={styles.blocks}>
          {isLoadingDroplets ? (
            <View style={styles.loading}><Text>Loading droplets...</Text></View>
          ) : (
            droplets.map(this.renderDroplet)
          )}
        </View>
        <View style={styles.header}>
          <Text style={styles.headerText}>Snapshots</Text>
        </View>
        <View style={styles.blocks}>
          {isLoadingSnapshots ? (
            <View style={styles.loading}><Text>Loading snapshots...</Text></View>
          ) : (
            snapshots.map(this.renderSnapshot)
          )}
        </View>
      </ScrollView>
    )
  }

  renderDroplet = droplet => {
    const {
      selectedDroplet,
      setSelectedDroplet,
    } = this.context

    const name =
      droplet.name[0].toUpperCase() + droplet.name.slice(1)

    return (
      <TouchableWithoutFeedback
        key={droplet.id}
        onPress={() =>
          selectedDroplet != droplet
            ? setSelectedDroplet(droplet)
            : setSelectedDroplet(undefined)
        }
      >
        <View style={styles.block}>
          <View style={styles.blockNameText}>
            <Text style={styles.blockNameText}>{name}</Text>
          </View>
          {this.renderDropletActions(droplet)}
        </View>
      </TouchableWithoutFeedback>
    )
  }

  renderDropletActions = droplet => {
    const { selectedDroplet } = this.context

    const {
      onPressDeleteDroplet,
      onPressSnapshotDroplet,
    } = this

    if (selectedDroplet != droplet) {
      return null
    }

    return (
      <View style={styles.actions}>
        <TouchableWithoutFeedback
          onPress={() => onPressDeleteDroplet(droplet)}
        >
          <FontAwesome style={styles.icon}>
            {Icons.trash}
          </FontAwesome>
        </TouchableWithoutFeedback>
        <TouchableWithoutFeedback
          onPress={() => onPressSnapshotDroplet(droplet)}
        >
          <FontAwesome style={styles.icon}>
            {Icons.camera}
          </FontAwesome>
        </TouchableWithoutFeedback>
      </View>
    )
  }

  renderSnapshot = snapshot => {
    const {
      selectedSnapshot,
      setSelectedSnapshot,
    } = this.context

    return (
      <TouchableWithoutFeedback
        key={snapshot.id}
        onPress={() =>
          selectedSnapshot != snapshot
            ? setSelectedSnapshot(snapshot)
            : setSelectedSnapshot(undefined)
        }
      >
        <View style={styles.block}>
          <View style={styles.blockNameText}>
            <Text style={styles.blockNameText}>
              {snapshot.name}
            </Text>
          </View>
          {this.renderSnapshotActions(snapshot)}
        </View>
      </TouchableWithoutFeedback>
    )
  }

  renderSnapshotActions = snapshot => {
    const { selectedSnapshot } = this.context

    const { onPressDeleteSnapshot } = this

    if (selectedSnapshot != snapshot) {
      return null
    }

    return (
      <View style={styles.actions}>
        <TouchableWithoutFeedback
          onPress={() => onPressDeleteSnapshot(snapshot)}
        >
          <FontAwesome style={styles.icon}>
            {Icons.trash}
          </FontAwesome>
        </TouchableWithoutFeedback>
      </View>
    )
  }
}

export { Overview }
This is from
source/screens/overview.js
It looks like there’s loads going on here, but there are only a couple new things:
- We’re rendering icons with
<FontAwesome>tags. The icons are really just text characters, rendered with the custom font files we downloaded. That’s why we can size the icons by defining a larger-than-normal fontSize. - When a coder presses one of the icon buttons, we ask for confirmation; using the Alert.alertmethod. Here, we can define a few buttons, and their follow-on actions.
Refactoring to components
This component is getting a bit large, so it’s a perfect candidate for extracting sub-components. Here are some of the components we can separate out from the Overview screen:
-
Header– for the textual headings of each resource type -
Block– for stuff that’s inside each droplet or snapshot block -
IconButton– to abstract the repeated code for creating these block buttons
At this point I refactored everything in Overview to drastically reduce its size. There are a lot of changes, but the resulting components are just repeating the code we’ve already seen. If you’d like to see all of the code, take a look at the repository.
Let’s take a look at two of these extracted components:
import React from "react"
import PropTypes from "prop-types"
import { Icons } from "react-native-fontawesome"

import { Actions } from "./actions"
import { IconButton } from "./icon-button"

const DropletActions = ({
  droplet,
  selectedDroplet,
  onPressDeleteDroplet,
  onPressSnapshotDroplet,
}) => {
  if (selectedDroplet != droplet) {
    return null
  }

  return (
    <Actions><IconButtononPress={() => onPressDeleteDroplet(droplet)}
      >
        {Icons.trash}
      </IconButton><IconButtononPress={() => onPressSnapshotDroplet(droplet)}
      >
        {Icons.camera}
      </IconButton></Actions>
  )
}

DropletActions.propTypes = {
  droplet: PropTypes.object.isRequired,
  selectedDroplet: PropTypes.object,
  onPressDeleteDroplet: PropTypes.func,
  onPressSnapshotDroplet: PropTypes.func,
}

DropletActions.defaultProps = {
  selectedDroplet: undefined,
  onPressDeleteDroplet: () => null,
  onPressSnapshotDroplet: () => null,
}

export { DropletActions }
This is from
source/components/droplet-action.js
This is the first functional component that we’re seeing. It’s a composition of a couple smaller functional components, doing the job of the previous renderDropletActions method.
import React from "react"
import PropTypes from "prop-types"

import { Block } from "./block"
import { DropletActions } from "./droplet-actions"

const Droplet = ({
  droplet,
  selectedDroplet,
  onPressDroplet,
  onPressDeleteDroplet,
  onPressSnapshotDroplet,
}) => {
  return (
    <Blockkey={droplet.id}
      onPress={() =>
        selectedDroplet != droplet
          ? onPressDroplet(droplet)
          : onPressDroplet(undefined)
      }
      label={droplet.name}
    >
      <DropletActions
        droplet={droplet}
        selectedDroplet={selectedDroplet}
        onPressDeleteDroplet={onPressDeleteDroplet}
        onPressSnapshotDroplet={onPressSnapshotDroplet}
      />
    </Block>
  )
}

Droplet.propTypes = {
  droplet: PropTypes.object.isRequired,
  selectedDroplet: PropTypes.object,
  onPressDroplet: PropTypes.func,
  onPressDeleteDroplet: PropTypes.func,
  onPressSnapshotDroplet: PropTypes.func,
}

Droplet.defaultProps = {
  selectedDroplet: undefined,
  onPressDroplet: () => null,
  onPressDeleteDroplet: () => null,
  onPressSnapshotDroplet: () => null,
}

export { Droplet }
This is from
source/components/droplet.js
Here, again, we see the previous renderDroplet method; reborn to use a few smaller functional components. It is also responsible for creating the DropletActions component, so it passes a few things down to that.
After all the refactoring, the Overview screen looks markedly clearer:
import React, { Component } from "react"
import { Alert, ScrollView } from "react-native"

import { Context } from "../context"

import {
  Blocks,
  Droplet,
  Header,
  Loading,
  Snapshot,
} from "../components"

const styles = {
  containerOuter: {
    backgroundColor: "#fff",
    flex: 1,
  },
  containerInner: {
    padding: 125,
    alignItems: "flex-start",
    justifyContent: "center",
  },
}

const cancelButton = () => ({
  text: "Cancel",
  style: "cancel",
})

const okButton = onPress => ({
  text: "Ok",
  onPress,
})

const confirm = (title, description, buttons) => {
  Alert.alert(title, description, buttons, {
    cancelable: false,
  })
}

class Overview extends Component {
  static contextType = Context

  async componentDidMount() {
    const { getDroplets, getSnapshots } = this.context
    await Promise.all([getDroplets(), getSnapshots()])
  }

  onPressDeleteDroplet = droplet => {
    const name = droplet.name

    confirm(
      `Delete ${name}`,
      `Are you sure you want to delete ${name}?`,
      [cancelButton(), okButton(() => alert("<delete>"))],
    )
  }

  onPressSnapshotDroplet = droplet => {
    const name = droplet.name

    confirm(
      `Delete ${name}`,
      `Are you sure you want to create a snapshot of ${name}?`,
      [cancelButton(), okButton(() => alert("<snapshot>"))],
    )
  }

  onPressDeleteSnapshot = snapshot => {
    const name = snapshot.name

    confirm(
      `Delete ${name}`,
      `Are you sure you want to delete ${name}?`,
      [cancelButton(), okButton(() => alert("<delete>"))],
    )
  }

  render() {
    const {
      droplets,
      isLoadingDroplets,
      snapshots,
      isLoadingSnapshots,
    } = this.context

    return (
      <ScrollView
        style={styles.containerOuter}
        contentContainerStyle={styles.containerInner}
      >
        <Header>Droplets</Header>
        <Blocks>
          {isLoadingDroplets ? (
            <Loading>Loading droplets...</Loading>
          ) : (
            droplets.map(this.renderDroplet)
          )}
        </Blocks>
        <Header>Snapshots</Header>
        <Blocks>
          {isLoadingSnapshots ? (
            <Loading>Loading snapshots...</Loading>
          ) : (
            snapshots.map(this.renderSnapshot)
          )}
        </Blocks>
      </ScrollView>
    )
  }

  renderDroplet = droplet => {
    const {
      selectedDroplet,
      setSelectedDroplet,
    } = this.context

    const {
      onPressDeleteDroplet,
      onPressSnapshotDroplet,
    } = this

    return (
      <Droplet
        key={droplet.id}
        droplet={droplet}
        selectedDroplet={selectedDroplet}
        onPressDroplet={setSelectedDroplet}
        onPressDeleteDroplet={onPressDeleteDroplet}
        onPressSnapshotDroplet={onPressSnapshotDroplet}
      />
    )
  }

  renderSnapshot = snapshot => {
    const {
      selectedSnapshot,
      setSelectedSnapshot,
    } = this.context

    const { onPressDeleteSnapshot } = this

    return (
      <Snapshot
        key={snapshot.id}
        snapshot={snapshot}
        selectedSnapshot={selectedSnapshot}
        onPressSnapshot={setSelectedSnapshot}
        onPressDeleteSnapshot={onPressDeleteSnapshot}
      />
    )
  }
}

export { Overview }
This is from
source/screens/overview.js
It’s still quiet a bit of code, but hopefully a lot clearer to someone reading it. Apart from splitting the components out, we’ve also reduced the repeated code in the confirmation events.
Making changes through the API
We’re just about ready to start making changes to our account. The first thing I want us to try is creating snapshots from existing droplets. To do this, we need a way to ask for the name of the new droplet. We’re going to lean on another library, to present this UI:
yarn add react-native-dialog-input
This library provides UI to ask questions which can be answered in plain-text. If you come from a web background; you may recognise this as resembling the prompt function:
import React from "react"
import PropTypes from "prop-types"
import Dialog from "react-native-dialog"

const DropletSnapshotPrompt = ({
  title,
  description,
  defaultValue,
  cancelButtonText,
  submitButtonText,
  isVisible,
  onChange,
  onCancel,
  onSubmit,
}) => (
  <Dialog.Container visible={isVisible}>
    <Dialog.Title>{title}</Dialog.Title>
    <Dialog.Description>{description}</Dialog.Description>
    <Dialog.Input
      defaultValue={defaultValue}
      onChangeText={onChange}
    />
    <Dialog.Button
      label={cancelButtonText}
      onPress={onCancel}
    />
    <Dialog.Button
      label={submitButtonText}
      onPress={onSubmit}
    />
  </Dialog.Container>
)

DropletSnapshotPrompt.propTypes = {
  title: PropTypes.string,
  description: PropTypes.string,
  defaultValue: PropTypes.string,
  cancelButtonText: PropTypes.string,
  submitButtonText: PropTypes.string,
  isVisible: PropTypes.bool.isRequired,
  onChange: PropTypes.func,
  onCancel: PropTypes.func,
  onSubmit: PropTypes.func,
}

DropletSnapshotPrompt.defaultProps = {
  title: "Create a snapshot",
  description: "What should the snapshot be called?",
  defaultValue: "my-snapshot",
  cancelButtonText: "Cancel",
  submitButtonText: "Ok",
  onChange: () => null,
  onCancel: () => null,
  onSubmit: () => null,
}

export { DropletSnapshotPrompt }
This is from
source/components/droplet-snapshot-prompt.js
…And then some changes in the App component:
// ...snip

import { DropletSnapshotPrompt } from "./components"

// ...snip

class App extends Component {
  state = {
    // ...snipisCreatingSnapshotOf: undefined,
    setIsCreatingSnapshotOf: isCreatingSnapshotOf => {
      this.setState({ isCreatingSnapshotOf })
    },
    createSnapshot: (droplet, snapshotName) => {
      // ...create snapshot
    }
  }

  // ...snip

  render() {
    const { state } = this

    const {
      screen,
      isCreatingSnapshotOf,
      setIsCreatingSnapshotOf,
      createSnapshot,
    } = state

    const Screen = Screens[screen]

    return (
      <View style={styles.container}>
        <Context.Provider value={state}>
          <Screen />
          <DropletSnapshotPrompt
            isVisible={isCreatingSnapshotOf !== undefined}
            onChangeText={name => {
              this.snapshotName = name
            }}
            onCancel={() => {
              setIsCreatingSnapshotOf(undefined)
            }}
            onSubmit={() => {
              createSnapshot(
                isCreatingSnapshotOf,
                this.snapshotName,
              )

              setIsCreatingSnapshotOf(undefined)
              this.snapshotName = ""
            }}
          />
        </Context.Provider>
      </View>
    )
  }
}

export { App }
This is from
source/app.js
So, here we see that the prompt is always rendered, but is only visible is we’re setting the state of setIsCreatingSnapshotOf to a droplet. If the cancel button is pressed, we just unset the isCreatingSnapshotOf value. If, on the other hand, a value is submitted; we can create a new snapshot:
// ...snip

import { DO_PREFIX } from "../config"

// ...snip

const request = async (token, method, url, data = {}) => {
  const headers = {
    "Content-Type": "application/json",
    Authorization: `Bearer ${token}`,
  }

  const formattedUrl = url
  const formattedBody = new FormData()

  const parameters = {
    method,
    headers,
  }

  if (method === "GET") {
    Object.keys(data).forEach(key => {
      const encoded = encodeURIComponent(data[key])
      formattedUrl += `${key}=${encoded}`
    })
  }

  if (method === "POST") {
    Object.keys(data).forEach(key => {
      formattedBody.append(key, data[key])
    })

    parameters.body = formattedBody
  }

  return fetch(formattedUrl, parameters)
}

class App extends Component {
  state = {
    // ...snipsnapshots: [],
    isLoadingSnapshots: false,
    isCreatingSnapshot: false,
    getSnapshots: async () => {
      const { token, snapshots } = this.state

      this.setState({ isLoadingSnapshots: true })

      const response = await request(
        token,
        "GET",
        `${DO_PREFIX}/snapshots`,
      )

      const result = await response.json()

      const newState = {
        snapshots: result.snapshots,
        isLoadingSnapshots: false,
      }

      if (result.snapshots.length !== snapshots.length) {
        newState.isCreatingSnapshot = false
      }

      this.setState(newState)
    },
    // ...snipcreateSnapshot: async (droplet, snapshotName) => {
      const { token } = this.state

      this.setState({ isCreatingSnapshot: true })

      const response = await request(
        token,
        "POST",
        `${DO_PREFIX}/droplets/${droplet.id}/actions`,
        {
          type: "snapshot",
          name: snapshotName,
        },
      )

      await response.json()
    },
  }

  // ...snip
}

export { App }
This is from
source/app.js
This action is similar to the code we have for getting droplets and snapshots. We have changed the getDroplets method, though, to tell us if new snapshots have been created.
We should listen out for that loading state, and set up a polling script; so that we can have some sort of activity indicator. Still, this code work!
Creating snapshots
Deleting snapshots
You’re bound to have one or two extra snapshots, after testing that code. Let’s add a way to remove them:
state = {
  // ...snipdeleteSnapshot: async snapshot => {
    const { token, getSnapshots } = this.state

    await request(
      token,
      "DELETE",
      `${DO_PREFIX}/snapshots/${snapshot.id}`,
    )

    await getSnapshots()
  },
}
This is from
source/app.js
We don’t really care about the results of the deletion request, unless there’s an uncaught exception. We should probably add some code to deal with that. After the snapshot has been deleted, we can reload the snapshots to reflect the change.
We also need to call this new method on the Overview screen:
onPressDeleteSnapshot = snapshot => {
  const { deleteSnapshot } = this.context

  const name = snapshot.name

  confirm(
    `Delete ${name}`,
    `Are you sure you want to delete ${name}?`,
    () => deleteSnapshot(snapshot),
  )
}
This is from
source/screens/overview.js
Deleting droplets
Similarly, we want to be able to delete droplets when we no longer require them. This is an important cost-saving measure; so without further adieu:
state = {
  // ...snipdeleteDroplet: async droplet => {
    const { token, getDroplets } = this.state

    await request(
      token,
      "DELETE",
      `${DO_PREFIX}/droplets/${droplet.id}`,
    )

    await getDroplets()
  },
}
This is from
source/app.js
Again, we have to call this method on the Overview screen:
onPressDeleteDroplet = droplet => {
  const { deleteDroplet } = this.context

  const name = droplet.name

  confirm(
    `Delete ${name}`,
    `Are you sure you want to delete ${name}?`,
    () => deleteDroplet(droplet),
  )
}
This is from
source/screens/overview.js
Creating droplets from snapshots
The last thing I want us to implement, as far as managing our account goes; is the ability to create new droplets from existing snapshots. We could implement new droplet creation, from scratch, but that isn’t as useful. I seldom need a clean installation.
My workflow is going to be:
- Create a droplet from a previous snapshot
- Work on that droplet for the day
- Create a new snapshot at the end of the day
- Delete the droplet
- Repeat
I’d love to spend a bit more time, talking about how to create droplets from scratch. I’d love to explore things like SSH key generation; so that we don’t have to mess with passwords. Perhaps I’ll expand on this topic later…
This is going to require a new screen, so here goes:
state = {
  // ...snipsizes: [],
  isLoadingSizes: false,
  getSizes: async () => {
    const { token } = this.state

    this.setState({ isLoadingSizes: true })

    const response = await request(
      token,
      "GET",
      `${DO_PREFIX}/sizes`,
    )

    const result = await response.json()

    this.setState({
      sizes: result.sizes,
      isLoadingSizes: false,
    })
  },
  regions: [],
  isLoadingRegions: false,
  getRegions: async () => {
    const { token } = this.state

    this.setState({ isLoadingRegions: true })

    const response = await request(
      token,
      "GET",
      `${DO_PREFIX}/regions`,
    )

    const result = await response.json()

    this.setState({
      regions: result.regions,
      isLoadingRegions: false,
    })
  },
  createDroplet: async (name, snapshot, size, region) => {
    const { token, setScreen } = this.state

    await request(
      token,
      "POST",
      `${DO_PREFIX}/droplets`,
      {
        name,
        region: region.slug,
        size: size.slug,
        image: snapshot.id,
      },
    )

    setScreen("Overview")
  },
}
This is from
source/app.js
Before we can create a droplet, we need to get the list of available droplet sizes and regions where they can be created. These methods resemble the getDroplets and getSnapshots methods we already have.
An interesting addition to these is the createDroplet method. Given a name, snapshot, size, and region; we can issue a command to create the droplet we’re after.
Unfortunately, the CreateDroplet screen is a lot of boring code. Let me show you what it looks like, and then we’ll go through the least boring bits:
import React, { Component } from "react"

import {
  ScrollView,
  Text,
  TextInput,
  TouchableOpacity,
  View,
} from "react-native"

import { Icons } from "react-native-fontawesome"

import { Context } from "../context"

import {
  Block,
  Blocks,
  Header,
  Loading,
  IconButton,
} from "../components"

const styles = {
  containerOuter: {
    backgroundColor: "#fff",
    flex: 1,
  },
  containerInner: {
    padding: 75,
    alignItems: "flex-start",
    justifyContent: "center",
  },
  blockLine: {
    width: "100%",
  },
  blockLineText: {
    textAlign: "center",
    lineHeight: 30,
    fontSize: 20,
  },
  nameInput: {
    width: "100%",
    borderWidth: 1,
    borderColor: "#f0f0f0",
    borderRadius: 4,
    backgroundColor: "#f5f5f5",
    fontSize: 20,
    padding: 10,
  },
  button: {
    marginTop: 20,
    marginLeft: 5,
    padding: 10,
    borderWidth: 1,
    borderColor: "#e0e0e0",
    borderRadius: 4,
    backgroundColor: "#f0f0f0",
  },
}

class CreateDroplet extends Component {
  static contextType = Context

  state = {
    selectedSnapshot: undefined,
    selectedSize: undefined,
    selectedRegion: undefined,
    name: "",
  }

  async componentDidMount() {
    const {
      getSnapshots,
      getSizes,
      getRegions,
    } = this.context

    await Promise.all([
      getSnapshots(),
      getSizes(),
      getRegions(),
    ])
  }

  onPressBack = () => {
    const { setScreen } = this.context
    setScreen("Overview")
  }

  onPressCreateDroplet = () => {
    const { createDroplet } = this.context

    const {
      name,
      selectedSnapshot,
      selectedSize,
      selectedRegion,
    } = this.state

    createDroplet(
      name,
      selectedSnapshot,
      selectedSize,
      selectedRegion,
    )
  }

  onPressSnapshot = snapshot => {
    this.setState({
      selectedSnapshot: snapshot,
      selectedSize: undefined,
      selectedRegion: undefined,
    })
  }

  onPressSize = size => {
    this.setState({
      selectedSize: size,
      selectedRegion: undefined,
    })
  }

  onPressRegion = region => {
    this.setState({
      selectedRegion: region,
    })
  }

  render() {
    const {
      isLoadingSnapshots,
      snapshots,
      isLoadingSizes,
      sizes,
      isLoadingRegions,
      regions,
    } = this.context

    const { name } = this.state

    const {
      onPressBack,
      onPressCreateDroplet,
      renderSnapshot,
      renderSize,
      renderRegion,
    } = this

    return (
      <ScrollView
        style={styles.containerOuter}
        contentContainerStyle={styles.containerInner}
      >
        <IconButton onPress={onPressBack}>
          {Icons.longArrowAltLeft}
        </IconButton>
        <Header>Name</Header>
        <TextInput
          value={name}
          onChangeText={name => this.setState({ name })}
          style={styles.nameInput}
        />
        <Header>Snapshots</Header>
        <Blocks>
          {isLoadingSnapshots ? (
            <Loading>Loading snapshots...</Loading>
          ) : (
            snapshots.map(renderSnapshot)
          )}
        </Blocks>
        <Header>Sizes</Header>
        <Blocks>
          {isLoadingSizes ? (
            <Loading>Loading sizes...</Loading>
          ) : (
            sizes.map(renderSize)
          )}
        </Blocks>
        <Header>Regions</Header>
        <Blocks>
          {isLoadingRegions ? (
            <Loading>Loading regions...</Loading>
          ) : (
            regions.map(renderRegion)
          )}
        </Blocks>
        <TouchableOpacity onPress={onPressCreateDroplet}>
          <View style={styles.button}>
            <Text>Create droplet</Text>
          </View>
        </TouchableOpacity>
      </ScrollView>
    )
  }

  renderSnapshot = snapshot => {
    const { selectedSnapshot } = this.state
    const { onPressSnapshot } = this

    return (
      <Block
        key={snapshot.id}
        onPress={() => onPressSnapshot(snapshot)}
        isHighlighted={selectedSnapshot && selectedSnapshot.id === snapshot.id}
        label={snapshot.name}
      >
        <View style={styles.blockLine}>
          <Text style={styles.blockLineText}>
            requires {snapshot.min_disk_size}GB storage
          </Text>
        </View>
      </Block>
    )
  }

  renderSize = size => {
    const { selectedSnapshot, selectedSize } = this.state
    const { onPressSize } = this

    return (
      <Block
        key={size.slug}
        onPress={() => onPressSize(size)}
        isHighlighted={selectedSize && selectedSize.slug === size.slug}
        isDisabled={selectedSnapshot && selectedSnapshot.min_disk_size > size.disk}
      >
        <View style={styles.blockLine}>
          <Text style={styles.blockLineText}>
          {size.vcpus}{" "}
          {size.vcpus == 1 ? "processor" : "processors"}
          </Text>
        </View>
        <View style={styles.blockLine}>
          <Text style={styles.blockLineText}>
            {size.memory >= 1024
            ? size.memory / 1024 + "GB "
            : size.memory + "MB "}
            memory
          </Text>
        </View>
        <View style={styles.blockLine}>
          <Text style={styles.blockLineText}>
            {size.disk}GB storage
          </Text>
        </View>
        <View style={styles.blockLine}>
          <Text style={styles.blockLineText}>
            ${size.price_monthly.toFixed(0)} per month
          </Text>
        </View>
      </Block>
    )
  }

  renderRegion = region => {
    const { selectedSize, selectedRegion } = this.state
    const { onPressRegion } = this

    return (
      <Blockkey={region.slug}label={region.name}onPress={() => onPressRegion(region)}
        isHighlighted={
          selectedRegion &&
          selectedRegion.slug === region.slug
        }
        isDisabled={
          selectedSize &&
          !selectedSize.regions.includes(region.slug)
        }
      />
    )
  }
}

export { CreateDroplet }
This is from
source/screens/create-droplet.js
This screen renders all the snapshots, sizes, and regions we are allowed to create droplets of. We have state variables for each selected thing, but we also reset selections when dependencies change.
For instance, when the snapshot selection changes; the new snapshot may require more memory than the size has. Therefore, we disable all the sizes that don’t have enough memory. If a new size is selected, but it is not available in a region, then we have to disable that region.
This leads to an interesting cascade of selections. Still, we can use these inputs to create a new snapshot; and we’ll be redirected back to the Overview screen to see the new snapshot.
I added some new functionality to the Block component, in the form of isHighlighted and isDisabled. If you’re interested to see how that works, check out the code on Github.
I’ve noticed that there is a short delay between deleting a droplet and it disappearing from the list. It would be useful for us to add a “refresh” button to the UI; or even just to remove the droplet from the state as opposed to reloading the state.

Creating droplets from snapshots
Connecting over SSH
The final bit of work I would like us to do; is to connect to one of these droplets over SSH. I’m not expecting to use an SSH terminal for the majority of the work, but it would be useful to have a way to start a VNC server or kill a process.
There’s a neat library for this:
yarn add react-native-ssh-sftp
Unfortunately, for iOS, there’s more we need to do. The iOS code depends on another library, called NMSSH; which can’t be as easily installed. There are a couple options presented, but the one I’ve chosen to go with is installing NMSSH through CocoaPods.
New React Native projects don’t come with any default CocoaPods configuration, but it’s easy enough to set up. cd into your ios folder, and run the following command:
pod init
This will create an almost-empty Podfile, in the same directory. To this, we will add the following code:
target '[your project name]' do
    pod 'NMSSH', '2.2.8'
end
This is from
ios/Podfile
We can follow this up by running:
pod install
If this is the first time you’re using CocoaPods; this install command will take a few minutes to run. CocoaPods is a dependency manager, much like NPM. Where NPM does a dependency lookup during the installation phase, CocoaPods downloads a database up-front; so subsequent installs are a bit quicker.
We should also link the React Native library, with:
react-native link react-native-ssh-sftp
Creating the SSH connect screen
We’re going to need to provide a way for the coder to enter usernames and passwords for their droplets. We also need a button which will switch to this screen:
state = {
  // ...snipdropletAddress: undefined,
  setDropletAddress: dropletAddress => {
    this.setState({ dropletAddress })
  },
}
This is from
source/app.js
// ...snip

class Overview extends Component {
  // ...snip

  onPressConnectDroplet = droplet => {
    const { setDropletAddress, setScreen } = this.context

    const address = droplet.networks.v4.find(
      network => network.type === "public",
    )

    setDropletAddress(address.ip_address)
    setScreen("ConnectToDroplet")
  }

  // ...snip

  renderDroplet = droplet => {
    const {
      selectedDroplet,
      setSelectedDroplet,
    } = this.context

    const {
      onPressDeleteDroplet,
      onPressSnapshotDroplet,
      onPressConnectDroplet,
    } = this

    return (
      <Droplet
        key={droplet.id}
        droplet={droplet}
        selectedDroplet={selectedDroplet}
        onPressDroplet={setSelectedDroplet}
        onPressDeleteDroplet={onPressDeleteDroplet}
        onPressSnapshotDroplet={onPressSnapshotDroplet}
        onPressConnectDroplet={onPressConnectDroplet}
      />
    )
  }

  // ...snip
}

export { Overview }
This is from
source/screens/overview.js
Here, we’re creating a new droplet action function; which will store the IP address of a selected droplet when invoked. We’ll use it when connecting to the droplet, on the new ConnectToDroplet screen:
import React, { Component } from "react"

import {
  ScrollView,
  Text,
  TextInput,
  TouchableOpacity,
  View,
} from "react-native"

import { Icons } from "react-native-fontawesome"
import SSHClient from "react-native-ssh-sftp"

import { Context } from "../context"
import { IconButton } from "../components"

const styles = {
  container: {
    backgroundColor: "#fff",
    flex: 1,
    alignItems: "center",
    justifyContent: "center",
  },
  button: {
    padding: 10,
    borderWidth: 1,
    borderColor: "#e0e0e0",
    borderRadius: 4,
    backgroundColor: "#f0f0f0",
  },
  errorText: {
    color: "red",
  },
  input: {
    width: 400,
    borderWidth: 1,
    borderColor: "#f0f0f0",
    borderRadius: 4,
    backgroundColor: "#f5f5f5",
    fontSize: 20,
    padding: 10,
  },
}

class ConnectToDroplet extends Component {
  static contextType = Context

  state = {
    isConnected: false,
    error: undefined,
    username: undefined,
    password: undefined,
  }

  onPressBack = () => {
    const { setScreen } = this.context
    setScreen("Overview")
  }

  onPressConnect = () => {
    const { username, password } = this.state
    const { dropletAddress } = this.context

    const client = new SSHClient(
      dropletAddress,
      22,
      username,
      password,
      error => {
        if (error) {
          this.setState({ error })
        } else {
          this.client = client
          this.setState({ isConnected: true })
        }
      },
    )
  }

  render() {
    const { isConnected } = this.state
    const { onPressBack } = this

    return (
      <View style={styles.container}>
        <IconButton onPress={onPressBack}>
          {Icons.longArrowAltLeft}
        </IconButton>
        {isConnected
          ? this.renderTerminal()
          : this.renderLogin()}
      </View>
    )
  }

  renderTerminal = () => {
    // ...render the terminal
  }

  renderLogin = () => {
    const { error } = this.state
    const { onPressConnect } = this

    return (
      <View>
        {error ? (
          <Text style={styles.errorText}>{error}</Text>
        ) : null}
        <TextInput
          onChangeText={username => this.setState({ username })}
          style={styles.input}
          autoCapitalize={"none"}
          autoCorrect={false}
        />
        <TextInput
          onChangeText={password => this.setState({ password })}
          style={styles.input}
          autoCapitalize={"none"}
          autoCorrect={false}
          secureTextEntry={true}
        />
        <TouchableOpacity onPress={onPressConnect}>
          <View style={styles.button}>
            <Text>Connect to droplet</Text>
          </View>
        </TouchableOpacity>
      </View>
    )
  }
}

export { ConnectToDroplet }
This is from
source/screens/connect-to-droplet.js
Before we can run commands on the server, we need to start a new SSH session. Using the SSH library we installed, and storing credentials via the onChangeText prop, we can make a new connection.
This library also allows connecting with private keys, which is great! We could use this if our app generated and stored SSH key pairs.
Before we connect, isConnected is false; so the login form is visible. If errors occur while trying to connect, they are rendered above the login form.
Once connected, we need to show the terminal interface:
// ...snip

const styles = {
  containerOuter: {
    backgroundColor: "#fff",
    flex: 1,
  },
  containerInner: {
    padding: 125,
    alignItems: "flex-start",
    justifyContent: "center",
  },
  // ...snip
}

class ConnectToDroplet extends Component {
  static contextType = Context

  state = {
    // ...sniplines: [],
    command: undefined,
  }

  // ...snip

  onPressRun = () => {
    const { command } = this.state

    this.client.execute(command, (error, output) => {
      if (error) {
        this.setState(({ lines }) => ({
          lines: [
            ...lines,
            ...error.message.split("\n"),
          ].slice(-100),
        }))
      } else {
        this.setState(({ lines }) => ({
          lines: [...lines, ...output.split("\n")].slice(
            -100,
          ),
        }))
      }
    })
  }

  // ...snip

  renderTerminal = () => {
    const { dropletAddress } = this.context
    const { lines } = this.state
    const { onPressRun } = this

    return (
      <ScrollView
        style={styles.containerOuter}
        contentContainerStyle={styles.containerInner}
        ref={scrollView => (this.scrollView = scrollView)}
        onContentSizeChange={() => this.scrollView.scrollToEnd({ animated: true })}
      >
      <Text>Connected to: {dropletAddress}</Text>
      {lines.map(this.renderLine)}
      <TextInput
        onChangeText={command => this.setState({ command })}
        style={styles.input}
        autoCapitalize={"none"}
        autoCorrect={false}
        onSubmitEditing={onPressRun}
      />
      </ScrollView>
    )
  }

  renderLine = (line, i) => {
    return (
      <View key={i + line}><Text>{line}</Text></View>
    )
  }
}

export { ConnectToDroplet }
This is from
source/screens/connect-to-droplet.js
Coders can use the TextInput we’ve created to input new commands. We’re using the onChangeTextprop to store the command text. When the input is submitted, the command is executed on the server.
The more output we store in memory, the more memory the app will use. It sounds silly saying that out loud, but it’s easy to forget. That’s why popular terminal emulators have common-sense limits on the number of lines they will allow to be stored in memory.
In this case, we’re splitting errors and output – depending on which a command generates – and adding them to a lines array. We’re also limiting the number of lines to 100.
Furthermore, we’ve added code to scroll the ScrollView to the bottom, each time its size changes. This means we will always see the latest output and/or errors directly above the command input.
Connecting via SSH
Going further
I’ve had a lot of fun building this app. I’m sure there are tons of things that can be done to improve it, but here are a few things that stand out:
- There are a few places where we’re making changes to or expecting changes from the API, which we don’t have a lot of clarity on. Creating new droplets looks like it happens immediately, but there’s no way for the API to tell us if it is done yet. We could add more checks around this. Checks like:
- Does the droplet have an IP address yet?
- Is it possible to connect to SSH yet?
- Similarly, there are more checks we could do, to make sure snapshots are completed before deleting the droplets on which they are based.
- I mentioned SSH keys, multiple times, because they’d be a great addition. The API allows the creation of droplets with custom SSH keys assigned to them. This would allow us to turn off password-based authentication for droplets, and skip the username/password step altogether.
- To make it work, we’d need a way of storing the keys, preferable not on the device. If we stored them on the device, and the app was uninstalled, we’d have no way of logging back into the servers we created with the lost SSH keys.
- We could cache a lot of things we’re making repeated requests for. We shouldn’t need to re-request the list of droplets or snapshots every time we load those views. Once a minute or only when a “refresh” button is pressed should be enough.
- The app looks pretty bad. Snapshots look like droplets look like options for creating new droplets. The “terminal” screen looks nothing like a terminal. All of these things could have a better design.
I’m definitely going to work on a better looking and functioning version of this app. It’s functional, for now!